Usando o Python no InterSystems IRIS – Montando o Relatório de Análise Exploratória de Dados
Olá,
Neste artigo vamos ver como usar o python para realizar a análise exploratória de dados (Exploratory Data Analysis - EDA) em um dataframe.
EDA é uma etapa importante no ciclo de análise de dados, É quando você examina os dados para entender suas características e padrões.
Uma EDA básica pode ser montada com dados estatísticos do dataframe como informações de média, mediana, moda, mínimo, máximo, desvio padrão de colunas do dataframe, e também de gráficos de barras, pizza, histogramas, boxplots, e outros que vão facilitar a visualização de tendências.
Vamos começar com a origem dos nossos dados. Para este artigo vamos pegar um arquivo do Kaggle,que é uma plataforma online muito popular na área de ciência de dados e aprendizado de máquina. Para este nosso trabalho vamos usar o dataset que está no arquivo healthcare-dataset-stroke-data.csv, que pode ser encontrado em https://www.kaggle.com/code/rishabh057/healthcare-dataset-stroke-data e importar no Iris.
Antes de importar os dados, vamos criar uma classe para armazenar os dados:
Class Kaggle.Stroke Extends (%Persistent, %XML.Adaptor)
{
Property index As %Integer [ SqlColumnNumber = 2 ];
Property gender As %String [ SqlColumnNumber = 3 ];
Property age As %Integer [ SqlColumnNumber = 4 ];
Property hypertension As %Boolean [ SqlColumnNumber = 5 ];
Property heartDisease As %Boolean [ SqlColumnNumber = 6 ];
Property everMarried As %String [ SqlColumnNumber = 7 ];
Property workType As %String [ SqlColumnNumber = 8 ];
Property residenceType As %String [ SqlColumnNumber = 9 ];
Property avgGlucoseLevel As %Numeric(SCALE = 2) [ SqlColumnNumber = 10 ];
Property bmi As %Numeric(SCALE = 2) [ SqlColumnNumber = 11 ];
Property smokingStatus As %String [ SqlColumnNumber = 12 ];
Property stroke As %Boolean [ SqlColumnNumber = 13 ];
}
Vá agora no SQL Explorer e vamos importar os dados do arquivo com o comando LOAD DATA do Iris. Para mais detalhes, veja a documentação em https://docs.intersystems.com/irislatest/csp/docbook/DocBook.UI.Page.cls?KEY=RSQL_loaddata
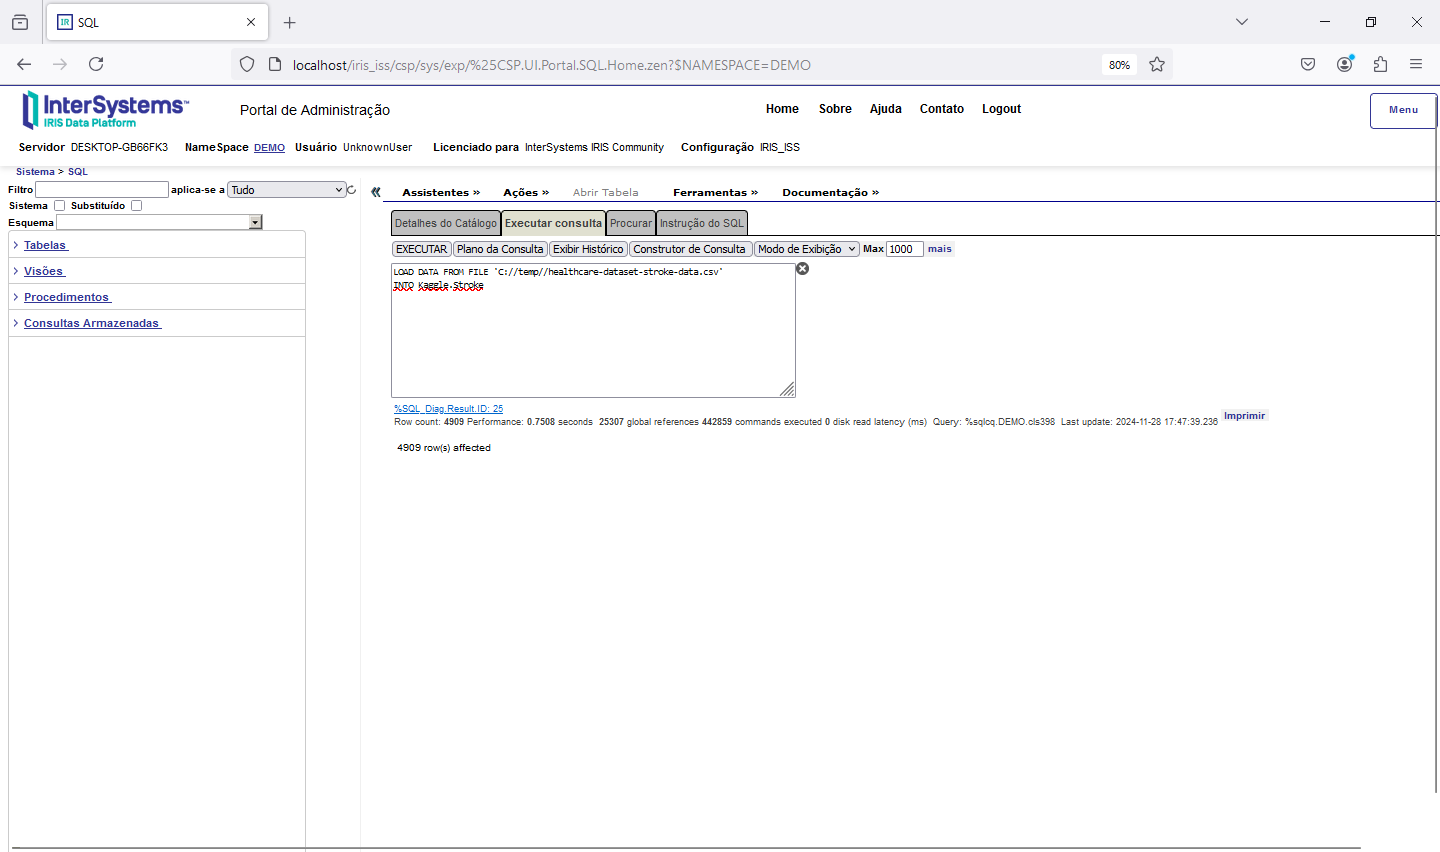
Execute o comando abaixo, trocando o diretório onde o arquivo CSV está armazenado:
LOAD DATA FROM FILE 'C://temp//healthcare-dataset-stroke-data.csv'
INTO Kaggle.Stroke
Veja agora a nossa tabela populada:
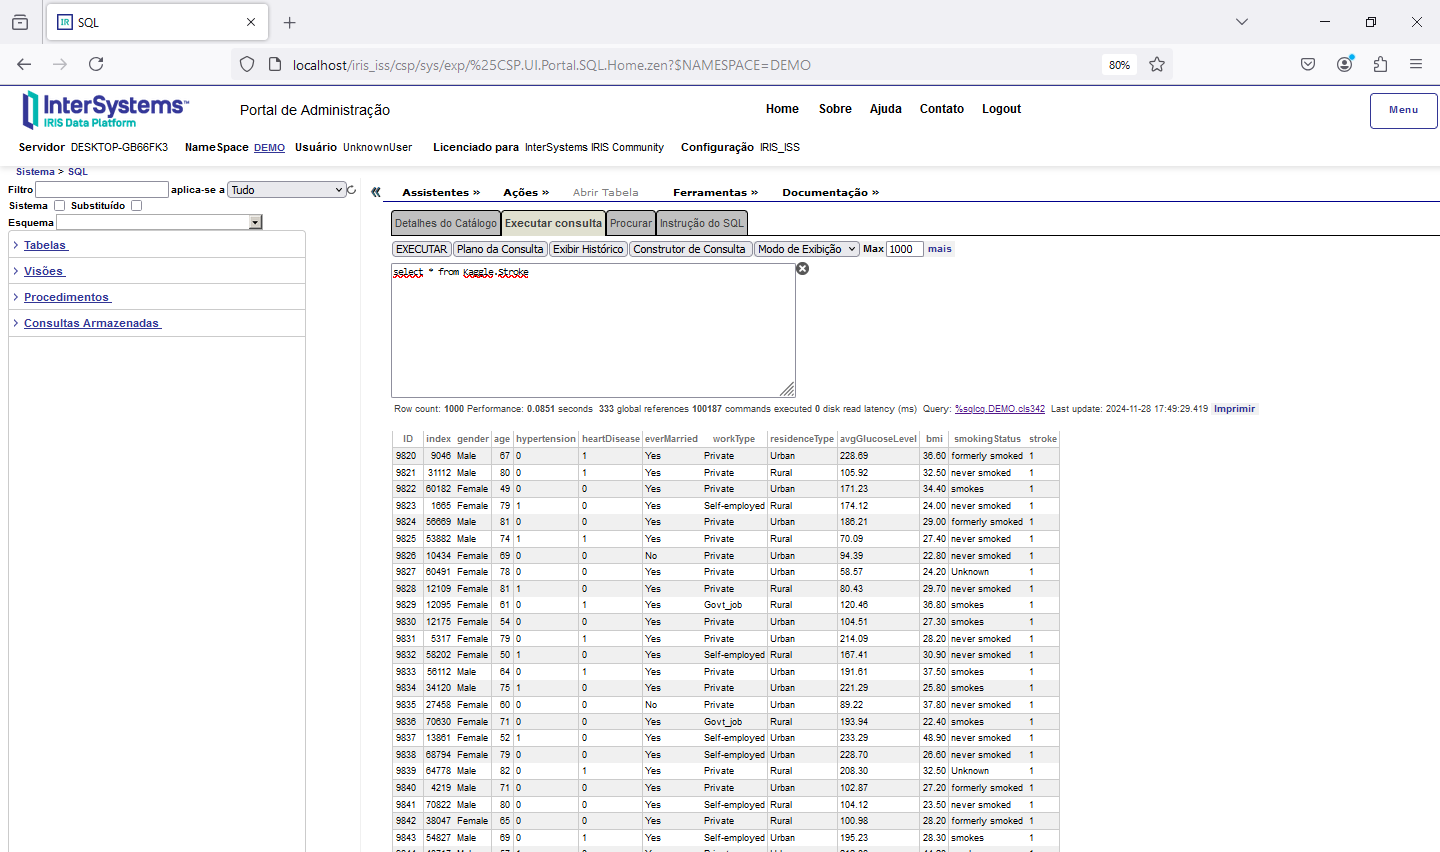
Agora vamos voltar ao nosso primeiro artigo sobre Python, quando exportamos os dados de uma tabela para o Excel: https://pt.community.intersystems.com/post/usando-o-python-no-intersystems-iris-%E2%80%93-exportando-dados-para-o-excel Vamos utilizar a mesma idéia agora para montar o nosso dataframe:
ClassMethod Relatorio() As %String [ Language = python ]
{
import iris
import pandas as pd
rs = iris.sql.exec("select * from Kaggle.Stroke")
df = rs.dataframe()
print(df)
}
Este trecho de código irá ler a nossa tabela Kaggle.Stroke e gerar um dataframe pandas a partir do recordset que foi criado pelo SQL. Executando nosso código já podemos visualizar nossos dados:
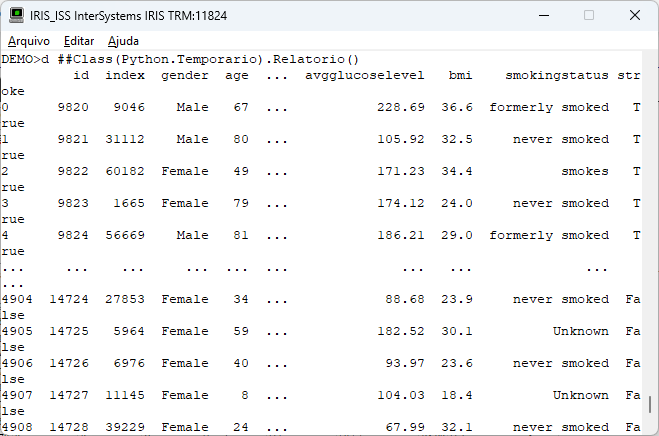
Podemos adicionalmente pedir ao pandas para devolver a estrutura do nosso dataframe com o comando info() substituindo a linha no nosso código abaixo:
print(df)
Pela linha abaixo:
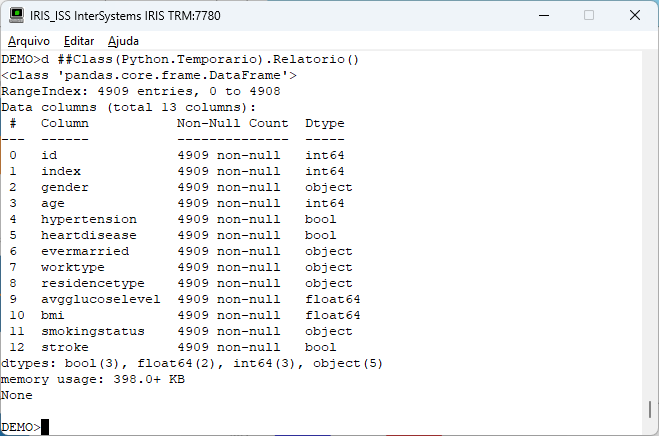
print(df.info())
A saída do nosso método agora ficará assim:
Agora com os dados carregados no dataframe já podemos realizar alguns levantamentos, como media, moda, mediana e outros:
ClassMethod Relatorio() As %String [ Language = python ]
{
import iris
import pandas as pd
rs = iris.sql.exec("select * from Kaggle.Stroke")
df = rs.dataframe()
print(df.info())
# Calculando estatísticas
relatorio = pd.DataFrame({
'Média': df[['age', 'avgglucoselevel', 'bmi']].mean(),
'Mediana': df[['age', 'avgglucoselevel', 'bmi']].median(),
'Moda': df[['age', 'avgglucoselevel', 'bmi']].apply(lambda x: x.mode()[0] if not x.mode().empty else None),
'Desvio Padrão': df[['age', 'avgglucoselevel', 'bmi']].std(),
'Valor Mínimo': df[['age', 'avgglucoselevel', 'bmi']].min(),
'Valor Máximo': df[['age', 'avgglucoselevel', 'bmi']].max()
})
print(relatório)
}
Executando nosso código já vemos as informações na tela:
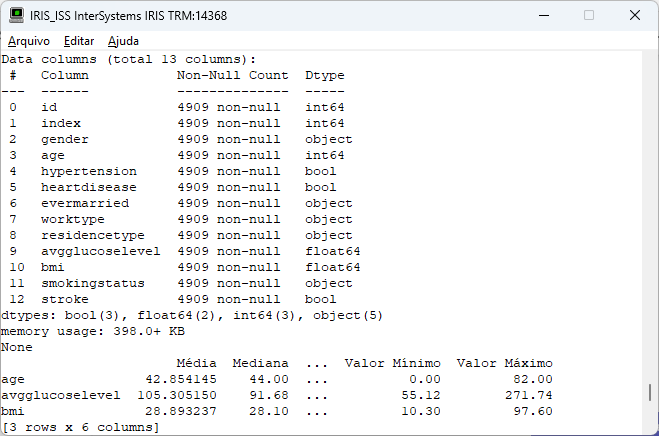
Aqui já podemos ver algumas informações interessantes:
- A Média é o valor obtido dividindo a soma de todos os elementos de um conjunto de dados pelo número de elementos.
- A Mediana é o valor central de um conjunto de dados ordenado.
- A Moda é o valor que aparece com mais frequência em um conjunto de dados.
- O Desvio Padrão mede o quão espalhados os valores estão em relação à média.
- O Valor Máximo é o maior valor em um conjunto de dados.
- O Valor Mínimo é o menor valor em um conjunto de dados.
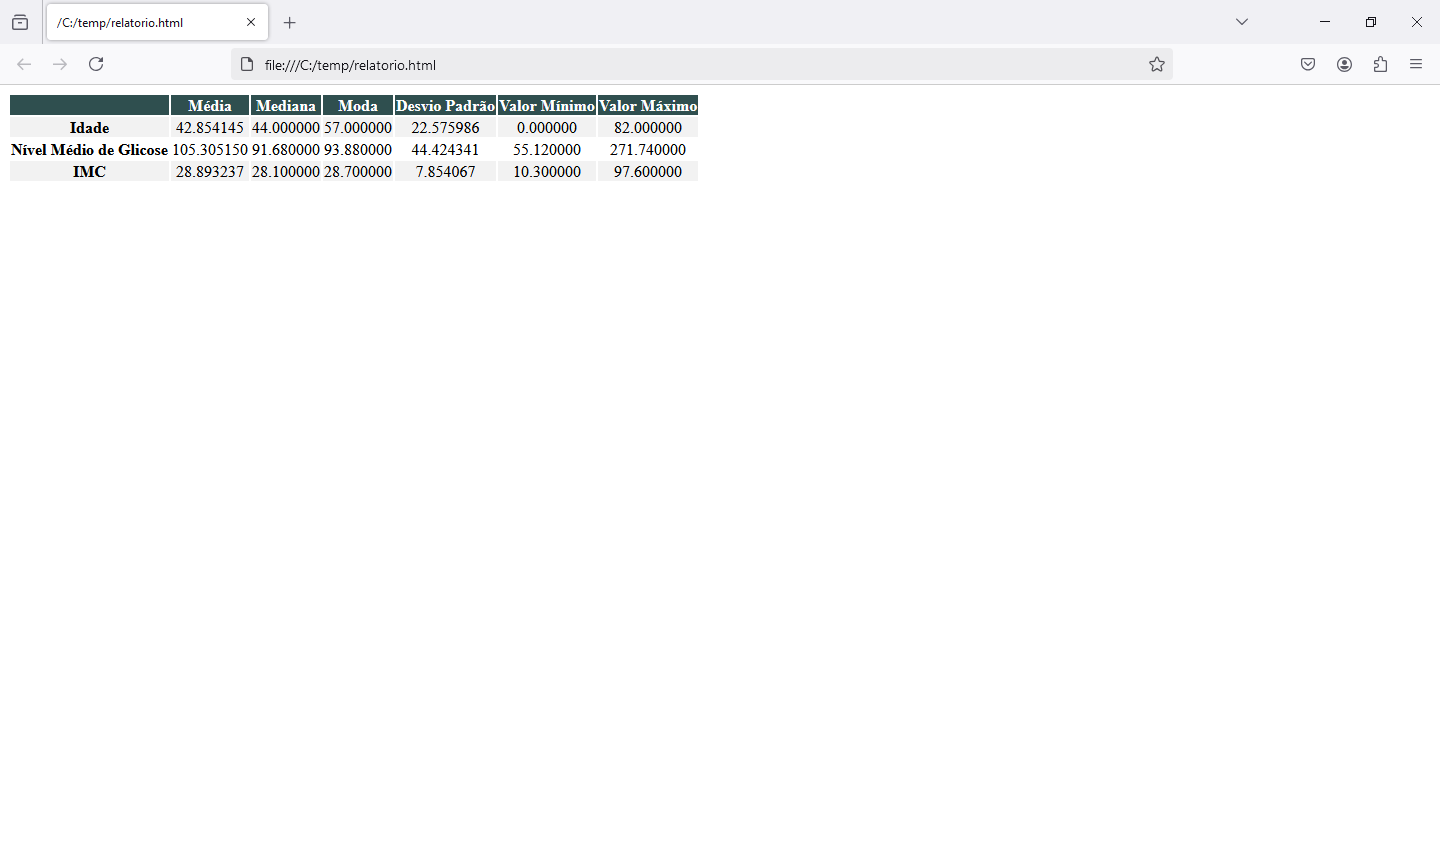
Vamos salvar nosso relatório como uma página HTML. Para isso vamos incluir alguns toques de CSS para termos uma apresentação mais agradável, e salvar nosso relatório em um arquivo HTML:
ClassMethod Relatorio(arquivo as %String = "") As %String [ Language = python ]
{
import iris
import pandas as pd
rs = iris.sql.exec("select * from Kaggle.Stroke")
df = rs.dataframe()
print(df.info())
if arquivo == "":
arquivo="relatorio"
# Calculando estatísticas
relatorio = pd.DataFrame({
'Média': df[['age', 'avgglucoselevel', 'bmi']].mean(),
'Mediana': df[['age', 'avgglucoselevel', 'bmi']].median(),
'Moda': df[['age', 'avgglucoselevel', 'bmi']].apply(lambda x: x.mode()[0] if not x.mode().empty else None),
'Desvio Padrão': df[['age', 'avgglucoselevel', 'bmi']].std(),
'Valor Mínimo': df[['age', 'avgglucoselevel', 'bmi']].min(),
'Valor Máximo': df[['age', 'avgglucoselevel', 'bmi']].max()
})
# Renomeando as colunas do dataframe para o relatório
relatorio.index = ['Idade', 'Nível Médio de Glicose', 'IMC']
# Estilizando a tabela para o HTML
styled_relatorio = (
relatorio.style
.set_table_styles(
[
{'selector': 'thead th', 'props': [('background-color', '#2F4F4F'), # Título em cinza escuro
('color', 'white'),
('text-align', 'center')]},
{'selector': 'tbody tr:nth-child(odd)', 'props': [('background-color', '#f2f2f2')]},
{'selector': 'tbody tr:nth-child(even)', 'props': [('background-color', 'white')]},
{'selector': 'tbody td', 'props': [('text-align', 'center')]},
]
)
)
# Salvando o relatório como HTML
html_output = styled_relatorio.to_html()
with open("c:\\temp\\" + arquivo + ".html", "w", encoding="utf-8") as f:
f.write(html_output)
}
Agora ao executar nosso código vemos o arquivo relatório.html no diretório c:\temp. Abrindo o arquivo vemos nossa tabela gerada:
Agora vamos passar aos gráficos. Vamos gerar um arquivo com todos os nossos gráficos. Poderíamos gerar arquivos separados com o mesmo código, fazendo algumas simples modificações. Vamos em frente:
ClassMethod Relatorio(arquivo as %String = "") As %String [ Language = python ]
{
import json
import iris
import pandas as pd
import seaborn as sns
from scipy.stats import mode
import matplotlib
import matplotlib.pyplot as plt
matplotlib.use("Agg")
rs = iris.sql.exec("select * from Kaggle.Stroke")
df = rs.dataframe()
if arquivo == "":
arquivo="relatorio"
# Calculando estatísticas
relatorio = pd.DataFrame({
'Média': df[['age', 'avgglucoselevel', 'bmi']].mean(),
'Mediana': df[['age', 'avgglucoselevel', 'bmi']].median(),
'Moda': df[['age', 'avgglucoselevel', 'bmi']].apply(lambda x: x.mode()[0] if not x.mode().empty else None),
'Desvio Padrão': df[['age', 'avgglucoselevel', 'bmi']].std(),
'Valor Mínimo': df[['age', 'avgglucoselevel', 'bmi']].min(),
'Valor Máximo': df[['age', 'avgglucoselevel', 'bmi']].max()
})
# Renomeando as colunas do dataframe para o relatório
relatorio.index = ['Idade', 'Nível Médio de Glicose', 'IMC']
# Estilizando a tabela para o HTML
styled_relatorio = (
relatorio.style
.set_table_styles(
[
{'selector': 'thead th', 'props': [('background-color', '#2F4F4F'),
('color', 'white'),
('text-align', 'center')]},
{'selector': 'tbody tr:nth-child(odd)', 'props': [('background-color', '#f2f2f2')]},
{'selector': 'tbody tr:nth-child(even)', 'props': [('background-color', 'white')]},
{'selector': 'tbody td', 'props': [('text-align', 'center')]},
]
)
)
# Salvando o relatório como HTML
html_output = styled_relatorio.to_html()
with open("c:\\temp\\" + arquivo + ".html", "w", encoding="utf-8") as f:
f.write(html_output)
# Exibindo o relatório
print("\n**Relatório Estatístico:**\n")
print(relatorio)
# Criando os gráficos
plt.figure(figsize=(25, 20))
# Boxplot
plt.subplot(5, 2, 1)
sns.boxplot(data=df[['age', 'avgglucoselevel']])
plt.title('Boxplot de Idade e Índice Glicêmico')
# Histograma para idade
plt.subplot(5, 2, 2)
df['age'].plot(kind='hist', bins=5, color='skyblue', title='Distribuição de Idade')
plt.xlabel('Idade')
# Gráfico de pizza para sexo
plt.subplot(5, 2, 3)
df['gender'].value_counts().plot(kind='pie', color=['orange', 'blue'], title='Distribuição por Sexo')
plt.ylabel('Frequência')
# Gráfico de pizza para AVC
plt.subplot(5, 2, 4)
df['stroke'].value_counts().plot(kind='pie', color=['lightgreen', 'salmon'], title='Ocorrência de AVC')
plt.ylabel('Frequência')
#plt.xticks(ticks=[0, 1], labels=['Não', 'Sim'])
# Gráfico de pizza para heartDisease
plt.subplot(5, 2, 5)
df['heartdisease'].value_counts().plot(kind='pie', color=['green', 'red'], title='Problema Cardiaco')
plt.ylabel('Frequência')
#plt.xticks(ticks=[0, 1], labels=['Não', 'Sim'])
# Gráfico de pizza para hypertension
plt.subplot(5, 2, 6)
df['hypertension'].value_counts().plot(kind='pie', color=['green', 'red'], title='Hipertensão')
plt.ylabel('Frequência')
#plt.xticks(ticks=[0, 1], labels=['Não', 'Sim'])
# Gráfico de pizza para residencetype
plt.subplot(5, 2, 7)
df['residencetype'].value_counts().plot(kind='pie', color=['green', 'red'], title='Tipo de Residencia')
plt.ylabel('Frequência')
#plt.xticks(ticks=[0, 1], labels=['Não', 'Sim'])
# Gráfico de barra para smokingstatus
plt.subplot(5, 2, 8)
df['smokingstatus'].value_counts().plot(kind='bar', color=['blue', 'red', 'green', 'gray'], title='Distribuição por Tipo de Fumante')
plt.ylabel('Frequência')
plt.xticks(rotation=45)
# Histograma para bmi
plt.subplot(5, 2, 9)
df['bmi'].plot(kind='hist', bins=5, color='lightgreen', title='Distribuição de BMI')
plt.xlabel('BMI')
# Histograma para avgglucoselevel
plt.subplot(5, 2, 10)
df['avgglucoselevel'].plot(kind='hist', bins=5, color='pink', title='Distribuição de Nivel de Glicose')
plt.xlabel('Nivel de Glicose')
# Ajustando o layout
plt.tight_layout()
# Salvando os Gráficos
caminho_arquivo = 'c:\\temp\\' + arquivo + '.png'
plt.savefig(caminho_arquivo, dpi=300, bbox_inches='tight')
plt.close()
# Gera JSON de saida
resultado = { 'relatorio': str(relatorio)
}
return json.dumps(resultado)
}
}
Lembre de verificar a lista de importações e certificar que você tem todas as bibliotecas necessárias para a execução do código.
Agora, executando nosso código temos a imagem gerada com os gráficos solicitados:
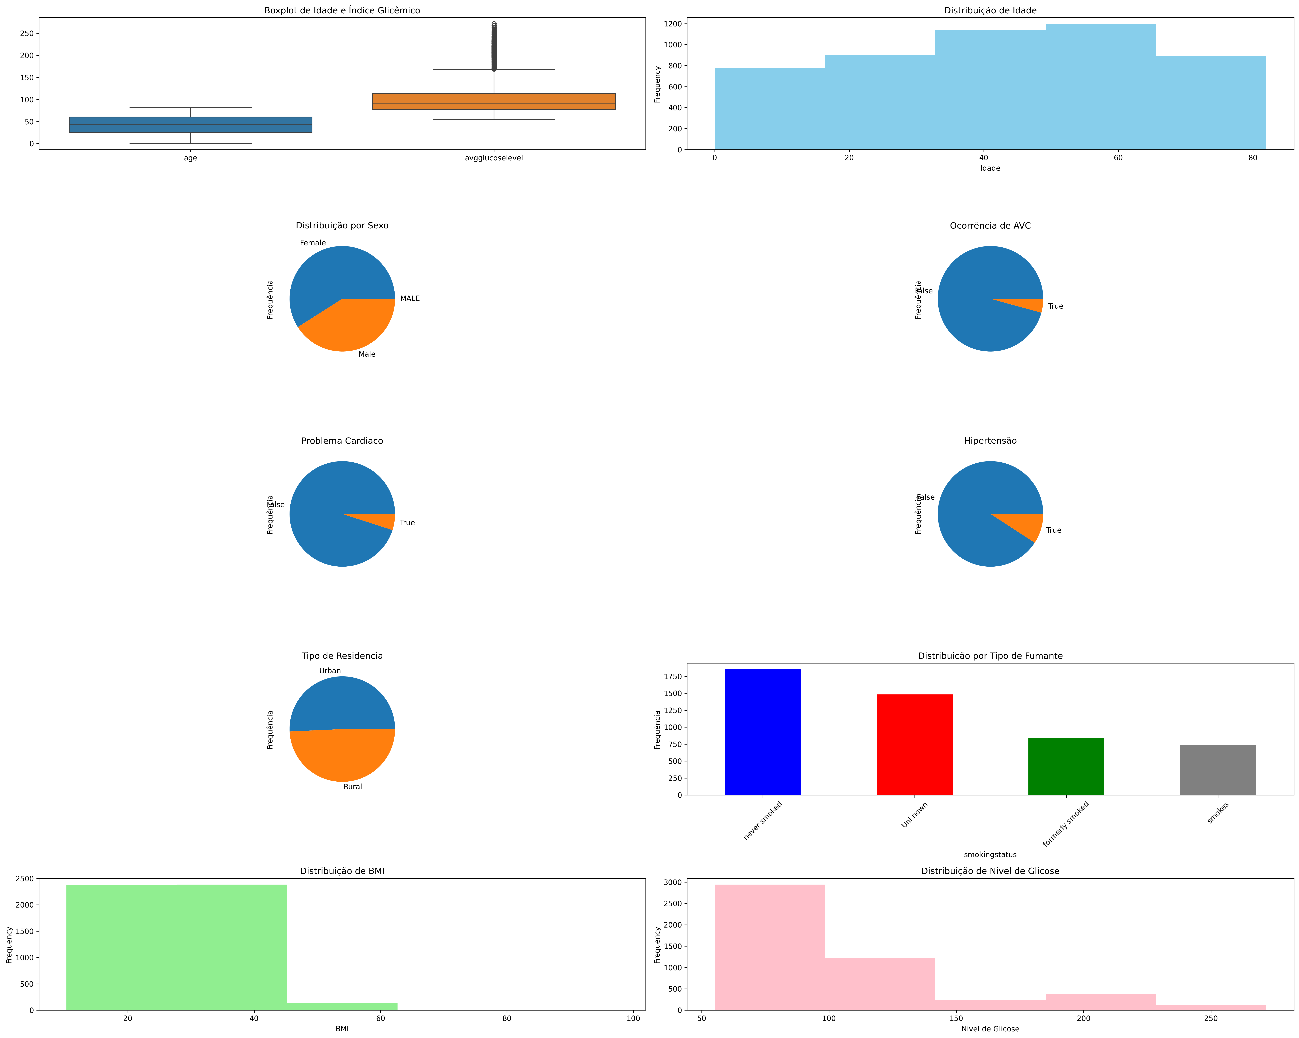
Com estes dados já podemos começar a montar uma EDA inicial para nosso projeto. É importante completar a EDA com informações sobre a origem dos dados. Quanto mais detalhada a EDA, mais informações ele trará para a criação do modelo de dados a ser utilizado nas previsões.
A EDA nos ajuda a entender os dados, seu comportamento e tendências. Também nos ajuda a identificar os melhores modelos a serem utilizados com os nossos dados.
Ainda dentro do projeto, em associação a EDA é importante montar um canvas de workflow, que vai ajudar a guiar no andamento do projeto. Em https://towardsdatascience.com/a-data-science-workflow-canvas-to-kickstart-your-projects-db62556be4d0 existe um modelo bem interessante de canvas:
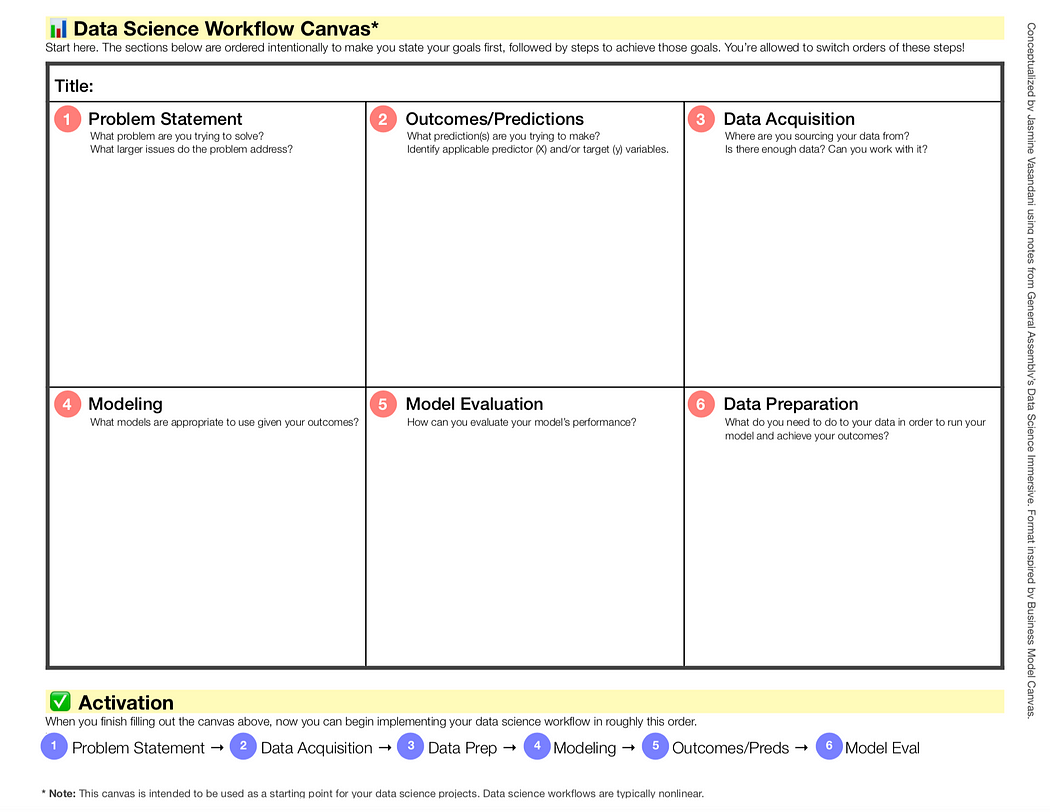
Ao preencher o modelo temos uma idéia muito boa do nosso projeto. Abaixo um canvas já preenchido de um projeto anterior:

O canvas workflow em conjunto com a EDA nos dá uma documentação inicial do nosso projeto como um guia para o desenvolvimento. Agora é refinar o material e montar o projeto.
.jpg)
.png)
.png)
.png) ou
ou .png)