Have you ever needed to change an IP or port before deploying an interface to production? Needed to remove items from an export? What about modifying the value(s) in a lookup table before deploying? Have you wanted to disable an interface before deploying? What about adding a comment, category, or alert setting to an interface before deploying to production?
If you’ve ever needed to make any changes to an interface or lookup table before deploying to production, then Export Editor is for you!
Export Editoris a Python/WSGI web application that provides a method for editing exports before deploying them to an IRIS/Health Connect production.
This tool allows you to:
- change any setting on an interface (whether a Business Service, Process, or Operation)
- modify any value in a lookup table
- remove items from an export.
Example Usage
So, how do you use Export Editor? Follow along with these steps to see how you could use Export Editor to migrate interfaces and tables from a test environment to a prod environment, while changing the configured IP addresses to point to a production server, changing the ports to use the production ports, disabling the interfaces before deploying to prod, and editing table data to appropriate production values.
First, you need to generate an export from an Interoperability Production, most likely from your non-prod environment.

After adding all desired items to the export (and removing any undesired items), save the export to one of the directories you have configured to be read by Export Editor.
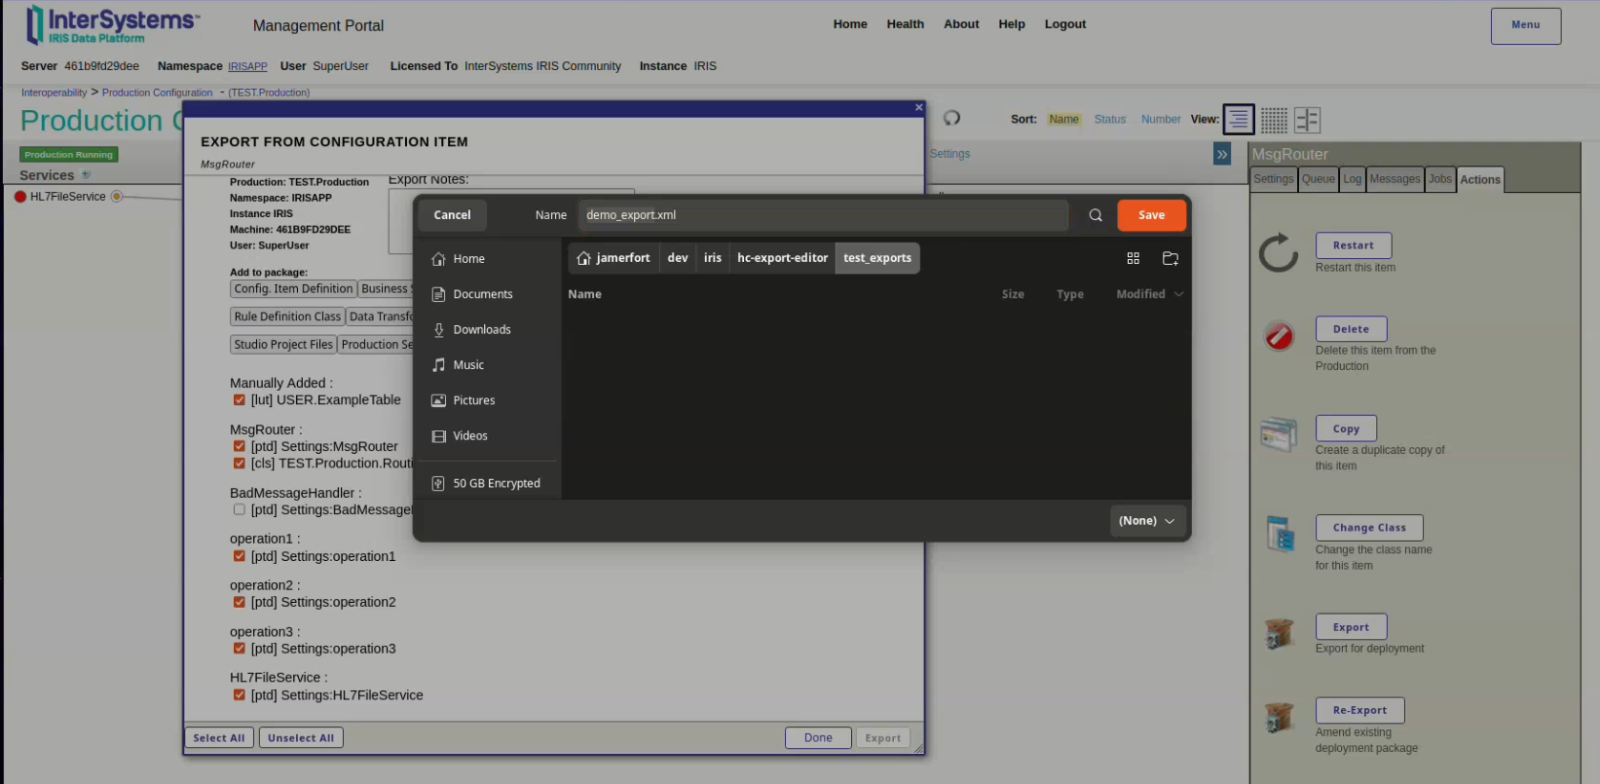
Now, you should be able to open the export from Export Editor.
.png)
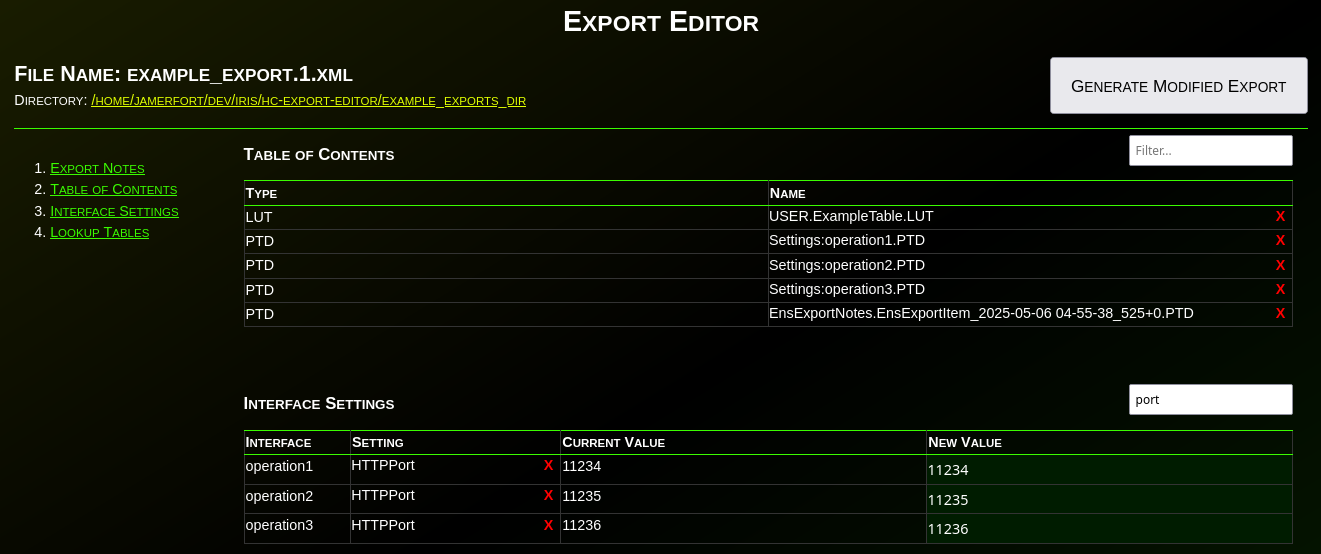
After opening the export, notice there are several sections. You can read about each section in the project's documentation (see link below). For now, let's focus on the "Interface Settings" section. This allows us to edit any properties for any included Services, Processes, or Operations. For instance, we can edit the FilePath setting for the HL7FileService that we exported from "/test-filesystem" to "/prod-filesystem".

Using the filter textbox to the top-right of the Interface Settings section, we can filter the settings to only those that include the word "server". This allows us to focus on specific settings across all interfaces, at once. Let's change the values from "test-server" to "prod-server".
.png)
Likewise, we can use the filter to only show port settings. Let's change the ports to match the desired production ports of these operations (1111, 2222, 3333 in this example).
.png)
Let's change all of the operations' "Enabled" attributes from "true" to "false":
.png)
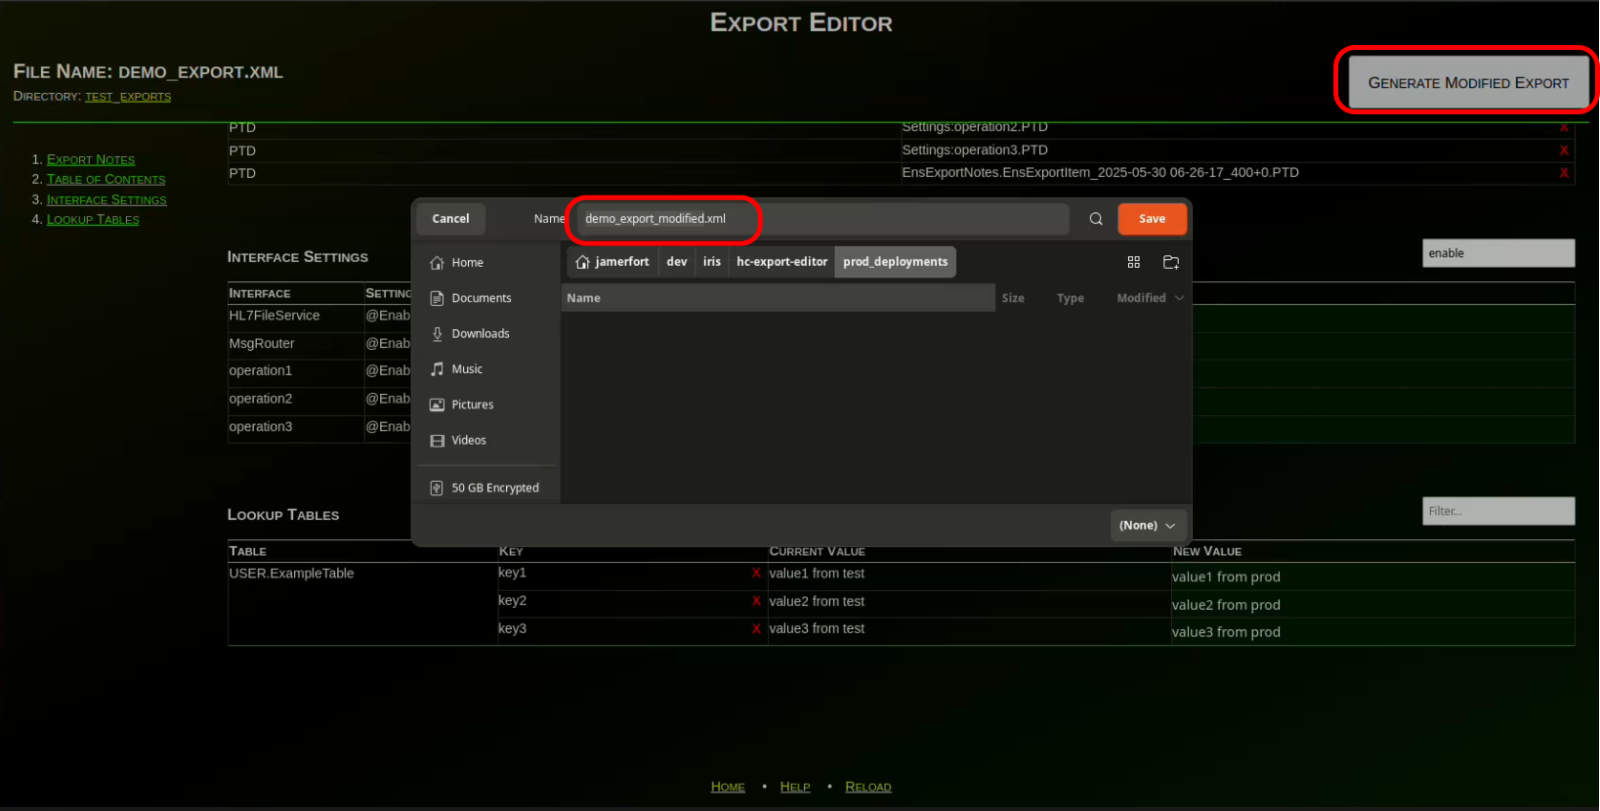
Finally, let's modify the values of the "User.ExampleTable" so that they reference "prod" instead of "test":

Now, click on the "Generate Modified Export" button (or hit "Enter" while in one of the editable fields) and save the modified export to your desired name/location. Remember this path, as we will use this file to deploy our changes to production.
Now, navigate to your production environment and open the "Interoperability > Manage > Deployment Changes > Deploy" for your production namespace:

Click the "Open Local Deployment" button at the top of the page, and select the modified export you saved in the previous steps:

Verify the deployment includes all of the desired items. Also, click the "Select Target Production" button on the right-hand side to select your desired production. When ready, click the "Deploy" button at the top to deploy to your production:

You have now successfully edited and deployed an export! Verify that your changes were applied to production (i.e. the operations were disabled, the file paths, server names, ports, and table values were updated to the desired values).


More Info
For more information on installing and using Export Editor, check out the hc-export-editor Open Exchange project.
 Open Exchange